

How To Install Tails On Vmware
How to install Tails on (internal or external) hard disk. How to install Tails in VirtualBox
The guide, describes how to install Tails to an hdd and enable persistence using Tails builtin tools, exists already. But the manual is outdated nowadays and it does not work. So I reviewed it and fixed it. The next text will explain how to install Tails on hard disk in 2021.
This instruction is only for those who really understand why he needs it. If you know why you need it, then you should also understand the disadvantage/consequences/differences from the usual installation of Tails.
We will use the built-in Tails tool, we will just patch them a bit.
By the way, in the same way you can install Tails in VirtualBox.
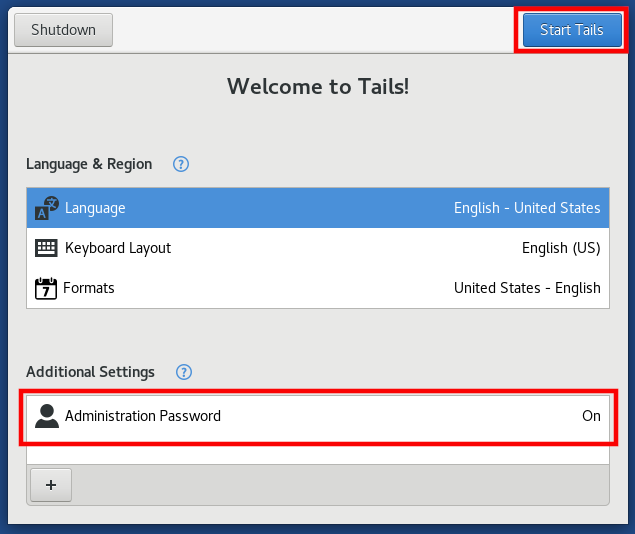
Boot from DVD/USB and set the Administrator Password. Click + (plus):

Click Administration Password:
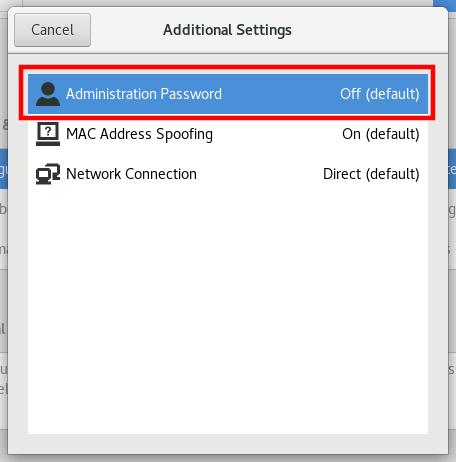
Enter and confirm any password:

Click Start Tails:
Then open the terminal.
Enter a command in the terminal to open the file:
sudo gedit /usr/lib/python3/dist-packages/tails_installer/creator.py
Find the line in it.
Only pay attention to USB and SDIO devices
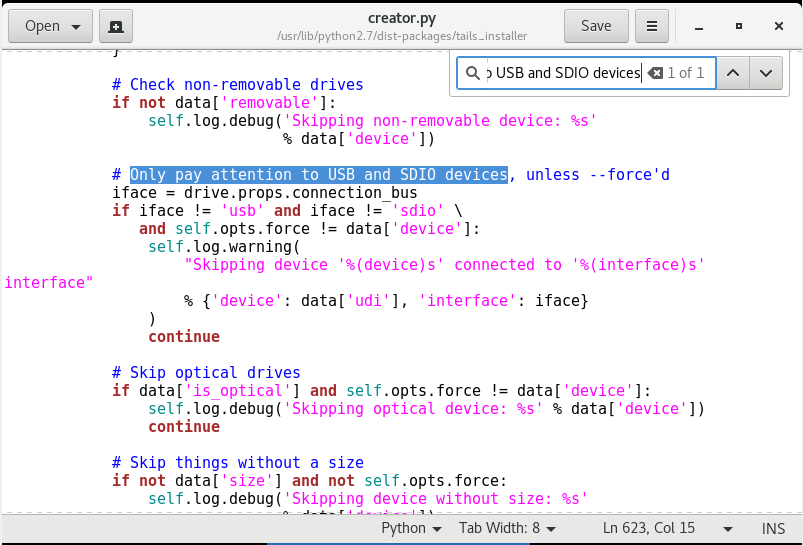
and comment out the next 8 lines by putting # in front of each line (changing the font color indicates that you did everything right). This should be done up to and including:
continue
It turns out:
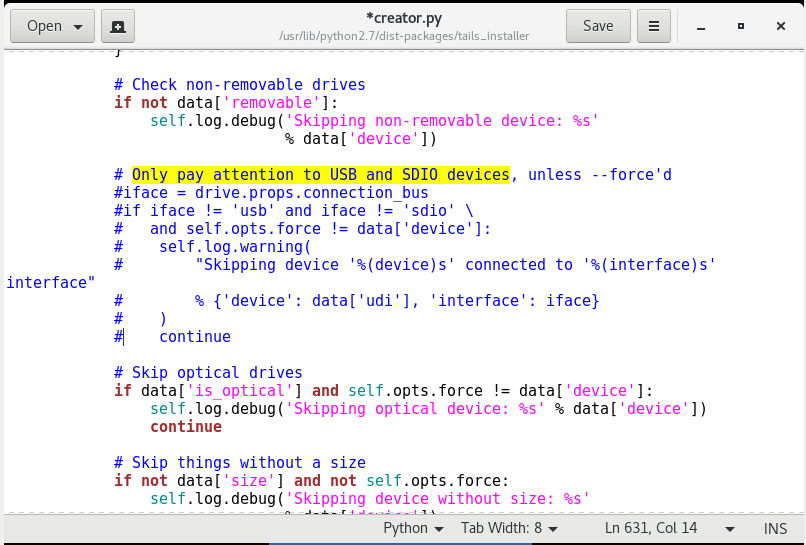
Save and close the file.
Now open the file:
sudo gedit /usr/lib/python3/dist-packages/tails_installer/gui.py
Find the line there
Skip devices with non-removable bit enabled
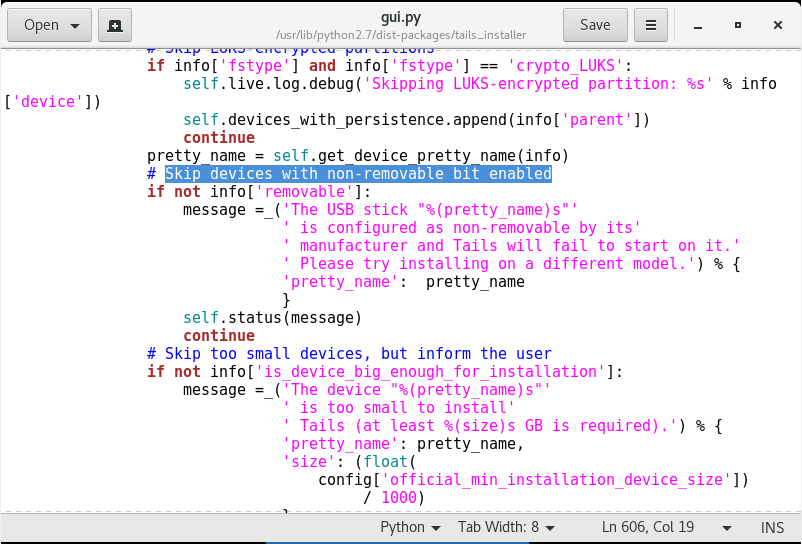
And comment out the next nine lines, down to and including
continue
It should look like this:
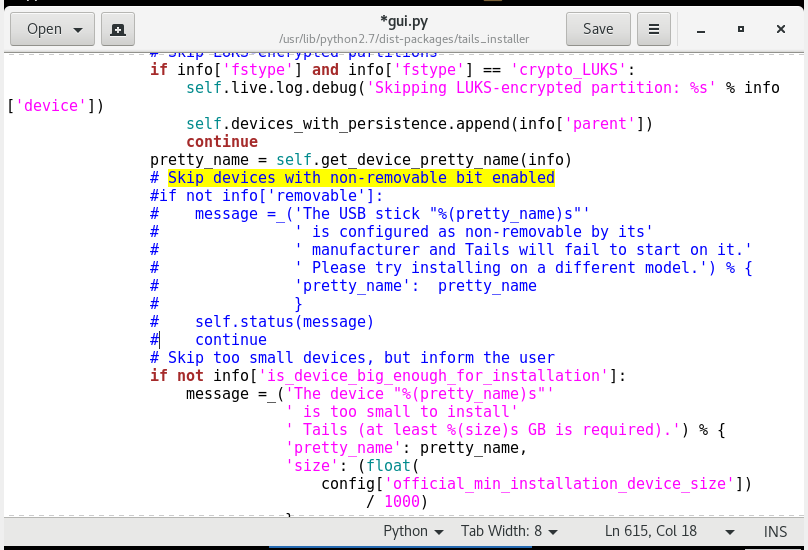
Save and close the file.
Now in the terminal run the command:
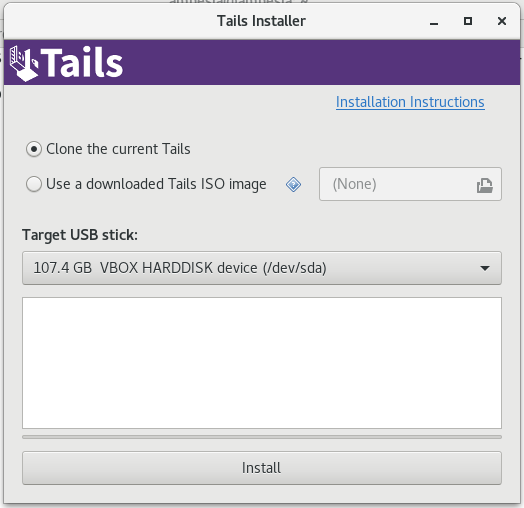
sudo /usr/bin/python3 -tt /usr/local/bin/tails-installer -u -n --clone -P -m -x
Select your disk and click Install:
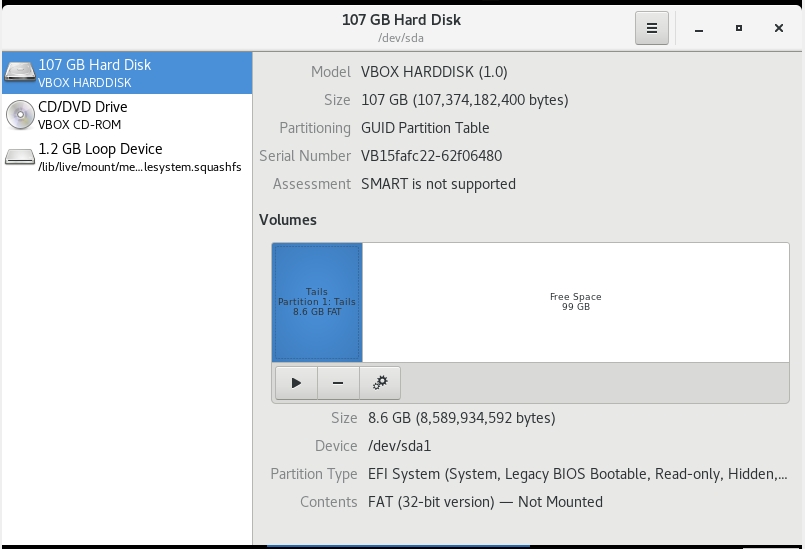
Without rebooting, mount the "Tails" partition from the device/disk you just created using Applications → Utilities → Disks:
In the terminal, run
gedit /media/amnesia/Tails/syslinux/live*.cfg
Two files will be opened in gedit:
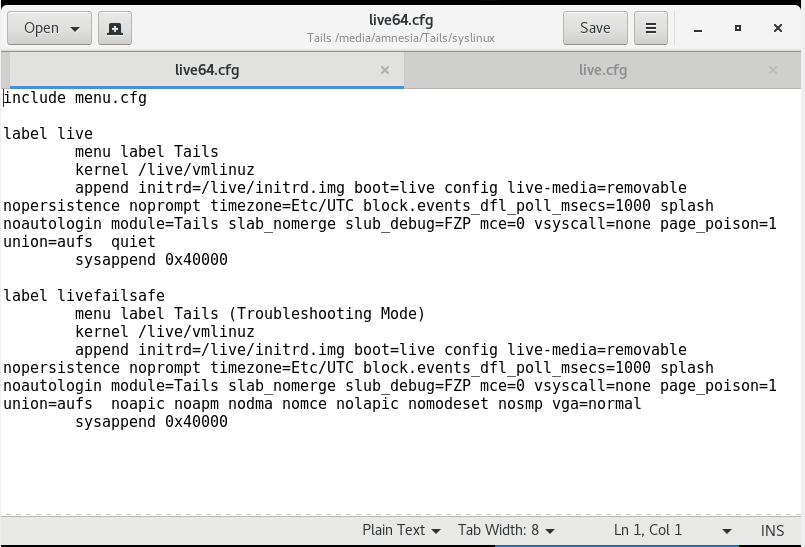
In each of them, find all occurrences of the string.
live-media=removable
and delete this stings.

Save and close these files.
Then in the terminal, run
gedit /media/amnesia/Tails/EFI/debian/grub*.cfg
The file will be opened in gedit. In it, similarly find all occurrences of the string.
live-media=removable
and delete this string.
Finally, run the command:
gedit /media/amnesia/Tails/EFI/debian/grub/grub*.cfg
As usual, gedit will open the file. Find all occurrences of the string in it
live-media=removable
and remove that line.
Reboot, select boot from disk (HDD) and when starting OS, set the Administration Password.
Now open a terminal and run there:
sudo gedit /usr/local/share/perl/*/Tails/Persistence/Setup.pm
Find in this file:
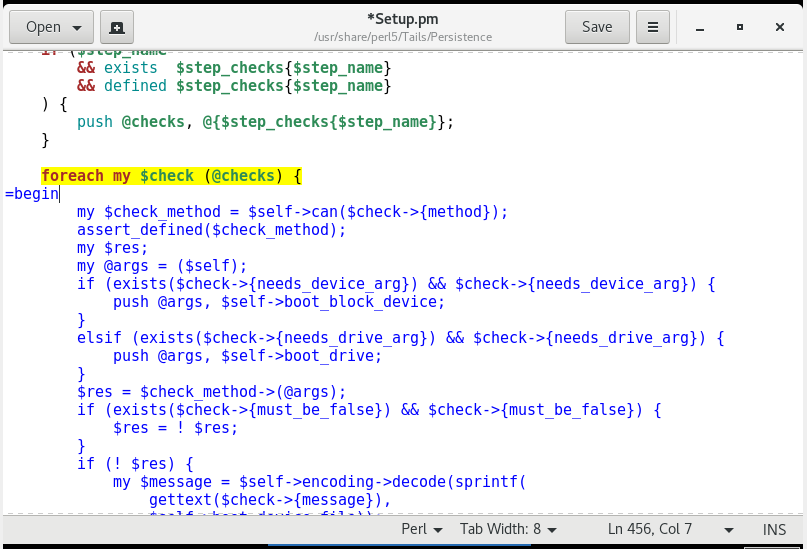
foreach my $check (@checks) { 
After this line, insert the line
=begin
Important: it MUST be placed in column 1! A change in color means you did everything right:
Below, find the line
return 1;
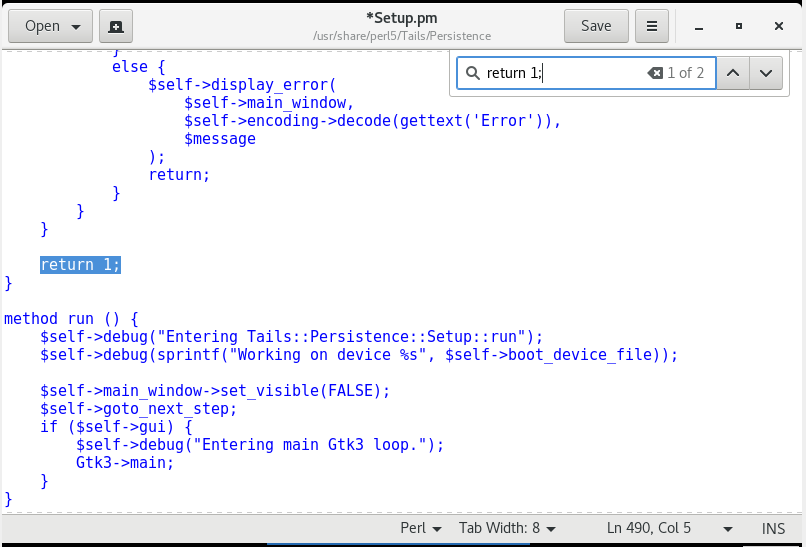
BEFORE (above the curly bracket "}", which is in the same column as the first "r" in "return 1;"), insert the line
=cut
Important: it MUST be placed in column 1:

As you usually do, run Applications → Tails → Configure persistant volume:
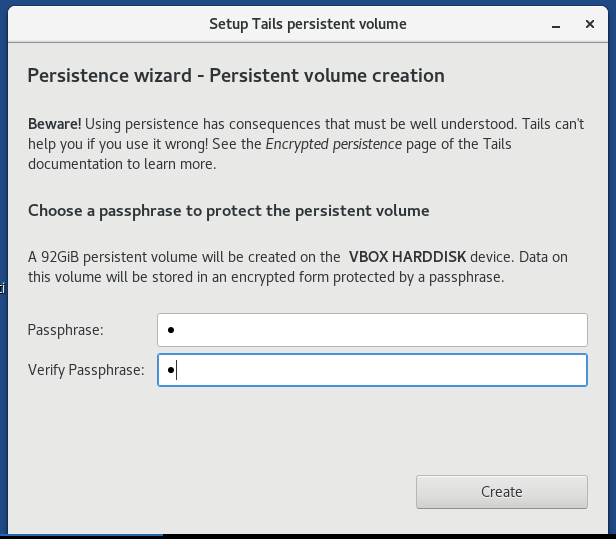
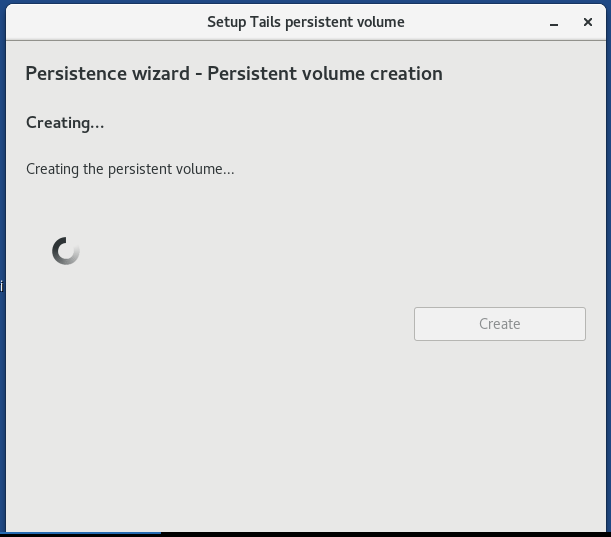
Set a password and create a persistent storage:
You may want to save two files (or at least /usr/local/share/perl/*/Tails/Persistence/Setup.pm) and replace them with a script after each reboot (care of the owners and permissions!) For your hdd-Tails behaves exactly like USB Tails.
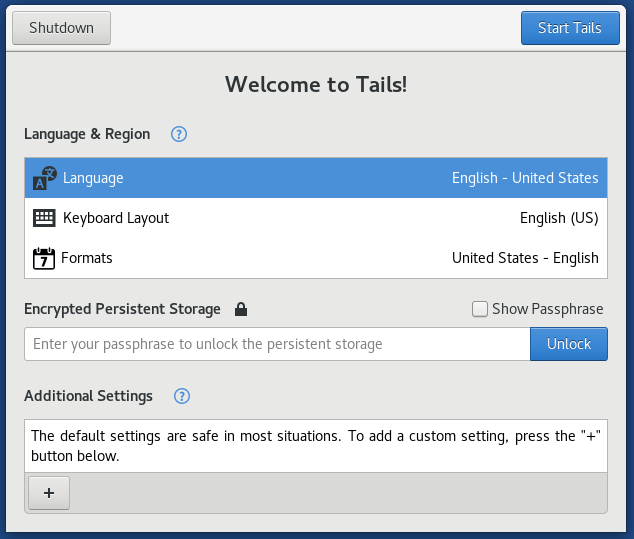
After reboot, a new field will appear in the welcome window, in which you can enter a password to enable the persistent storage:
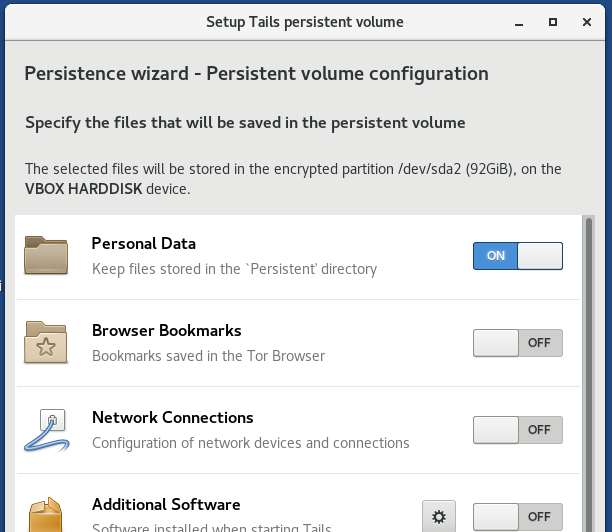
As usual, you can configure persistent storage through the menu (remember that /usr/local/share/perl/*/Tails/Persistence/Setup.pm should be patched as shown above):
You might want to save the two files (at least /usr/share/perl5/Tails/Persistence/Setup.pm) and replace them after each reboot by a script (take care of ownership and permissions!) so that your hdd-Tails behaves exactly like a USB-Tails.
I recommend to back up the Setup.pm file:
cp /usr/local/share/perl/*/Tails/Persistence/Setup.pm /home/amnesia/Persistent/
I also recommend creating a file into which we will collect some useful actions:
Create a file:
gedit Persistent/start.sh
Copy-paste into it:
#!/bin/bash # mount -o remount -w /lib/live/mount/medium # Usually it is not necessary rm /usr/local/share/perl/*/Tails/Persistence/Setup.pm cp /home/amnesia/Persistent/Setup.pm /usr/local/share/perl/`perl -v | grep -E -o '[0-9]+\.[0-9]+\.[0-9]+'`/Tails/Persistence/Setup.pm # The following lines only if you installed Tails in VirtualBox #Not need anymore anyway VBoxClient --clipboard VBoxClient --draganddrop VBoxClient --display VBoxClient --checkhostversion VBoxClient --check3d VBoxClient --seamless VBoxClient --vmsvga
After rebooting, run the file as follows:
sudo bash Persistent/start.sh
As a result, the patched version of the Setup.pm file will be restored in the system, and VirtualBox Guest Additions processes will be launched - the screen will become large, the clipboard will work, and so on.
Be aware that 'automatic' upgrade (in place upgrade) might not work anymore and you need to manually upgrade.
Error "The configuration of your additional software failed"
This error occurs when the following conditions are combined:
- Tails is installed on a hard disk or in a virtual machine
- persistent storage enabled
- you install additional software
- you select the option "install this software every time Tails is turned on"
Error text on screen:
The configuration of your additional software failed. Please check your list of additional software or read the system log to understand the problem.

Error text in the log:
[INFO] New packages manually installed: {'chromium'} [ERROR] /usr/bin/tails-persistence-setup returned with 2 [ERROR] [ERROR] (tails-persistence-setup:310): dbind-WARNING **: 05:59:53.377: Couldn't register with accessibility bus: Did not receive a reply. Possible causes include: the remote application did not send a reply, the message bus security policy blocked the reply, the reply timeout expired, or the network connection was broken. [ERROR] Prototype mismatch: sub Tails::Persistence::Setup::__ ($) vs none at (eval 428) line 2. [ERROR] _build_boot_block_device: getting liveos_mountpoint [ERROR] liveos_mountpoint: /lib/live/mount/medium [ERROR] Entering underlying_block_device (/lib/live/mount/medium) [ERROR] readlink returned: /dev/sda1 [ERROR] [ERROR] Leaving underlying_block_device, returning: /org/freedesktop/UDisks2/block_devices/sda1 [ERROR] Entering underlying_block_device (/lib/live/mount/medium) [ERROR] readlink returned: /dev/sda1 [ERROR] [ERROR] Leaving underlying_block_device, returning: /org/freedesktop/UDisks2/block_devices/sda1 [ERROR] Error: Tails is running from non-USB / non-SDIO device. The key here is the line "Error: Tails is running from non-USB / non-SDIO device". The system made a check to ensure that it does not work on a USB drive or an optical disc and was unable to add additional software to the list of automatically installed.
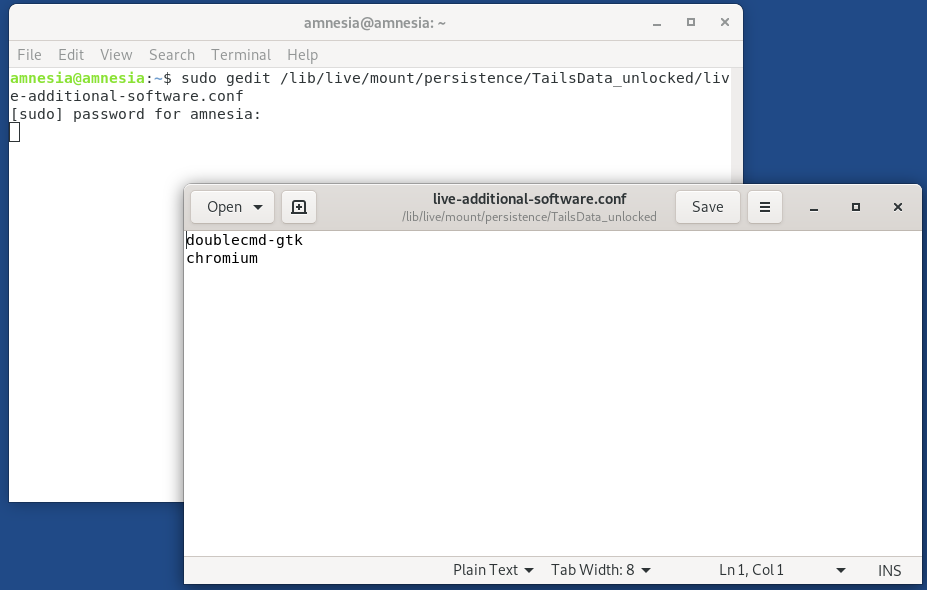
Instead of trying to figure out which file you need to edit to fix the error, you can take a simple path – just add the packages you need to the file that contains the list of programs for unattended installation. This is the /lib/live/mount/persistence/TailsData_unlocked/live-additional-software.conf file.
How To Install Tails On Vmware
Source: https://miloserdov.org/?p=2595
Posted by: millerbeatento.blogspot.com
0 Response to "How To Install Tails On Vmware"
Post a Comment